Enabling SPF and DMARC
SPF and DMARC are DNS records that tell receiving mail servers your emails are legitimate. Together with DKIM, they form the three pillars of email authentication. If you have not finished setting up SES yet, see Setting up and verifying your SES account first - the onboarding wizard surfaces all three sets of records on a single screen, and this article is a deeper dive into the DMARC half.
Enable SPF
SPF (Sender Policy Framework) tells receiving servers that Amazon SES is authorised to send email on behalf of your domain. The recommended way to set this up is through SES's Custom MAIL FROM domain feature, which creates a dedicated subdomain for your sending and keeps SPF alignment in good shape for DMARC.
Open the identity you created when verifying your domain and scroll down to the Custom MAIL FROM domain section.

Click Edit and check the Use a custom MAIL FROM domain checkbox. Enter a short subdomain name - we recommend m (which gives you m.yourdomain.com). Leave the Behavior on MX failure setting as the default.
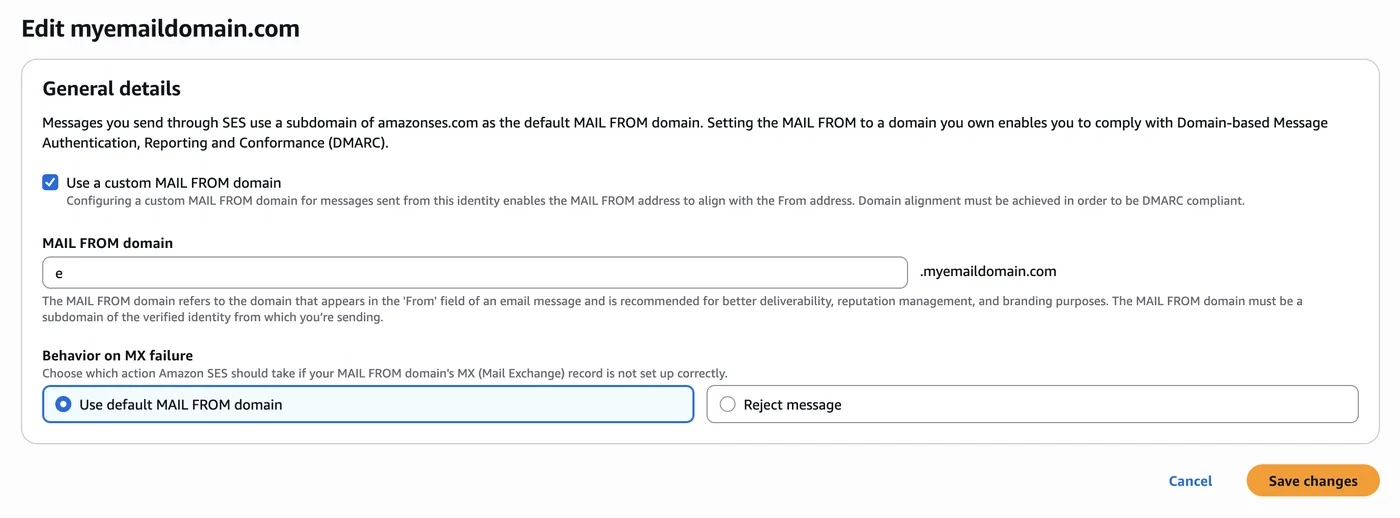
Click Save changes. SES will now show two DNS records you need to add to your domain.
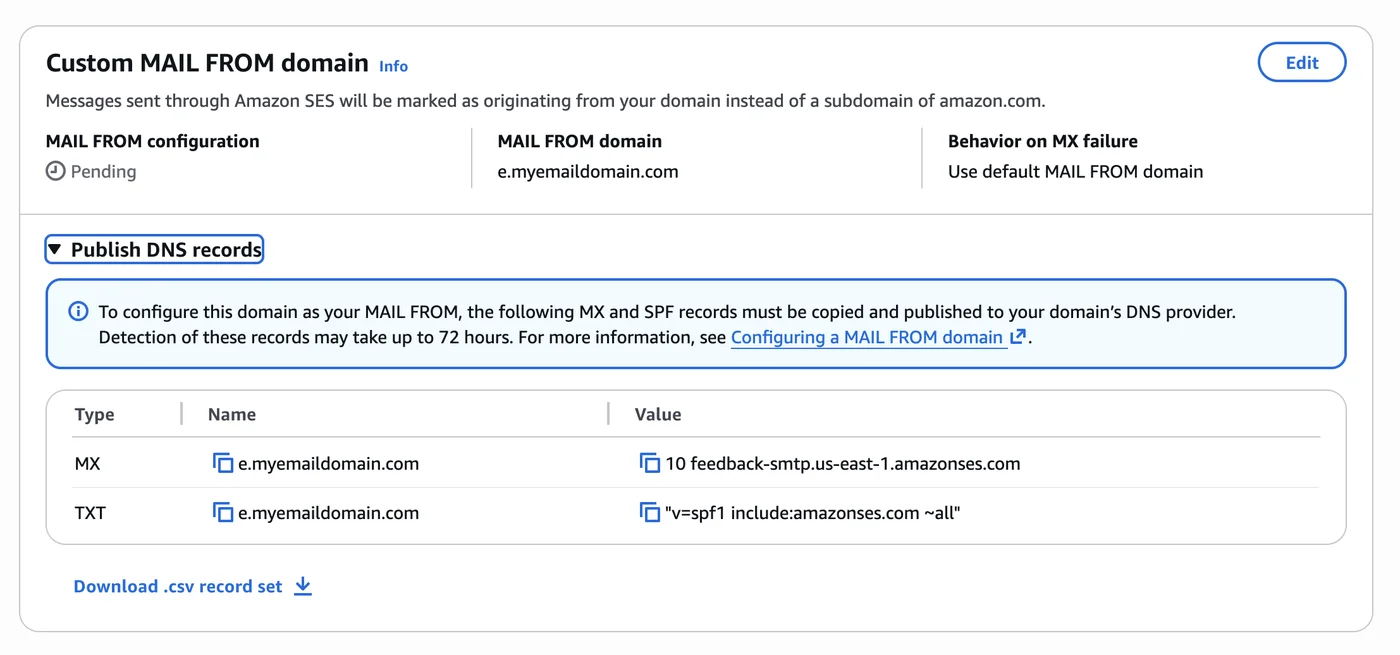
Add both records in your DNS provider's control panel - an MX record and a TXT record, both on the subdomain name shown (for example e). Most providers expect you to enter just the subdomain prefix rather than the full hostname. Once added, SES will verify the records and the status will move from Pending to Success - this can take up to 72 hours.
Enable DMARC
DMARC (Domain-based Message Authentication, Reporting and Conformance) tells receiving servers what to do when an email fails DKIM or SPF checks, and gives you visibility into who is sending mail on behalf of your domain.
Add a new TXT record:
| Field | Value |
|---|---|
| Name / Host | _dmarc |
| Value | v=DMARC1; p=none; rua=mailto:you@yourdomain.com |
| TTL | 3600 (or your provider's default) |
Replace you@yourdomain.com with a real inbox where you want to receive aggregate reports. These are daily digest emails showing which messages passed or failed authentication.
Choosing a policy
The p= tag controls what happens to mail that fails authentication:
| Policy | Effect |
|---|---|
p=none | No action taken - reports only. Use this to start. |
p=quarantine | Failing mail is sent to the recipient's spam folder. |
p=reject | Failing mail is rejected outright. |
Start with p=none to monitor your reports before enforcing a stricter policy. Once you are confident all legitimate sending is passing DKIM, move to p=quarantine or p=reject.
Verify your records
You can check both records are live using MXToolbox: use the SPF Lookup and DMARC Lookup tools with your domain. DNS changes typically take a few minutes to propagate but can take up to 24 hours.